My husband and I bought our first house together in November 2014. Immediately after closing we discovered I was pregnant with our first child. So naturally all the focus for the past year and a half has been about preparing for the baby's arrival, learning how to be a mother and keeping my baby alive rather than decorating our house and buying furniture. Well now that I am finally feeling a little more settled in my role as a mother, I have finally had the chance to start dreaming up ideas for turning our house into a home...
For the past few months we've been slowly crossing things off of our want list: painting, decorating, new furniture, etc.. It's all slowly coming together in the way I guess any newlywed's first house does. Or probably much slower in our case because "decorating" definitely still sits pretty low on my priorities list when compared to the real necessities of being a wife/mother and caring for my family. But either way, I'm learning how to juggle it all a little better - the "mom brain" fog is starting to clear a little (if that is even possible), and one of the rooms I noticed has unfortunately suffered from the most neglect has been our Master Bedroom. It's supposed to be a room of escape and tranquility, and instead it's just a boring blank canvas with hand me down (and lack thereof) furniture you would expect to see in a college dorm room - not a young, 4 years married couple's home.
We've talked and talked and looked and looked specifically for a bed or headboard to get the mood of our room started. The trouble has been that not only do my husband and I have a hard time agreeing on furniture, but there is also the limiting factor of our mattress setup. We have a King, Tempur-Pedic mattress (that I am absolutely obsessed with, btw), but that's not the challenging part... The challenging part is that it sits on one of those mechanical bases - you know, the kind that will lift up the the head and/or foot of the mattress to your desired setting and vibrate/massage. (We so fancy, right?) Well with a mattress base like that, it turns out you're very limited to the kinds of beds you can buy that will actually fit and accommodate the mechanical base underneath. So because we had a hard time finding something that would actually work for us, that we BOTH liked, to simplify it all we decided to eliminate the entire bed part and just focus on finding a wall mounted headboard. Easy-peasy... You would think.
After sending my husband photos and photos.... and more photos of headboards that he simply had no interest in, I finally forwarded along a link I had found on Pinterest and said "...Or we could make this one instead." I figured it was a total shot in the dark because I didn't think he would like it (and I was even more certain he wouldn't want to have to make it for me); but I went for it anyway because I LOVED the headboard and just HAD to have it. To my surprise and delight he actually really liked it and agreed to make it! So needless to say, my spirit soared with glee and I quickly put a shopping list together and went about hunting for pallet boards immediately so we could get started.
Full, detailed instructions on on how to make the headboard can be found here.
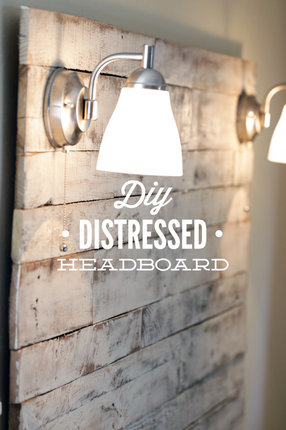
Photo credit: livesimply.me
The whole project ended up costing us around $30. It just depends on what supplies and tools you already have on hand. Pretty much all we had to buy was the wood and the right kind of nails.
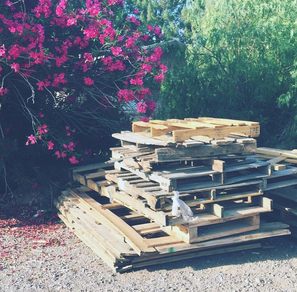
I checked craigslist for pallet boards, which turns out to be a great resource for them if you're ever in the market for a project you're working on. It also helped that I live in farm country out here in Gilbert so I didn't have to drive far to pick some up. I found a guy who said for $5 I could take as many as I wanted! I know some people say you should never have to pay for pallet boards, but honestly $5 isn't much and I was happy to pay a little something. I don't usually feel comfortable just taking things from people, even if they offer. I'm too much of a "giver".
I checked craigslist for pallet boards, which turns out to be a great resource for them if you're ever in the market for a project you're working on. It also helped that I live in farm country out here in Gilbert so I didn't have to drive far to pick some up. I found a guy who said for $5 I could take as many as I wanted! I know some people say you should never have to pay for pallet boards, but honestly $5 isn't much and I was happy to pay a little something. I don't usually feel comfortable just taking things from people, even if they offer. I'm too much of a "giver".
We bought the plywood at Home Depot and just had them cut it to size for us (which they'll do for free). The other supplies we already had (paint, hand sander, table saw, etc.)
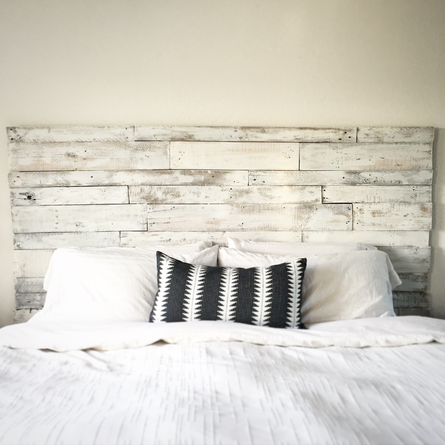
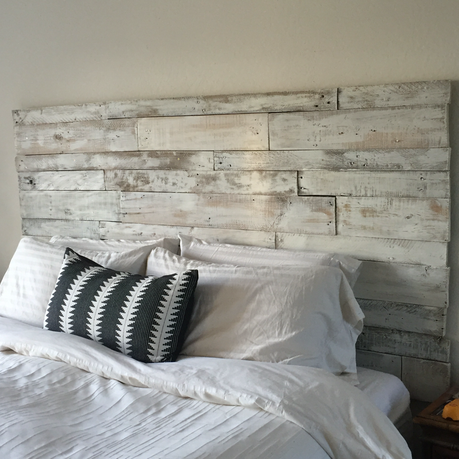
The plans on Live Simply's website had sconces attached to the headboard - which I loved, but I decided I want lamps on my nightstands so we skipped that step.
We we also made our headboard a little wider. The dimensions Live Simply used were just narrower than the size of a king bed (which is 74") and we wanted ours to go just wider, so our dimensions were 80"x42" but of course you can do whatever fits your style preference.
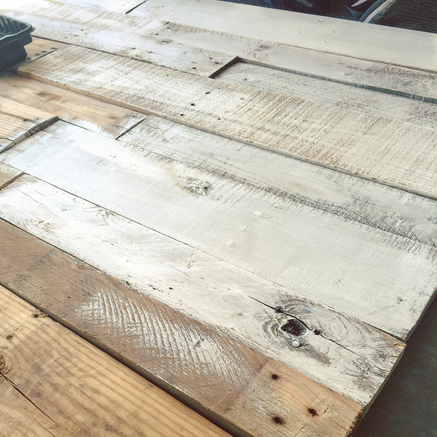
Once you have all of your supplies all you have to do is start cutting up the pallet boards, arrange them on the back of the plywood, nail them on, paint it, sand it, hang it up and you're all done! It's so cute and so simple and I seriously couldn't be happier. It was exactly what I wanted.
The plans on Live Simply's website had sconces attached to the headboard - which I loved, but I decided I want lamps on my nightstands so we skipped that step.
We we also made our headboard a little wider. The dimensions Live Simply used were just narrower than the size of a king bed (which is 74") and we wanted ours to go just wider, so our dimensions were 80"x42" but of course you can do whatever fits your style preference.
Once you have all of your supplies all you have to do is start cutting up the pallet boards, arrange them on the back of the plywood, nail them on, paint it, sand it, hang it up and you're all done! It's so cute and so simple and I seriously couldn't be happier. It was exactly what I wanted.
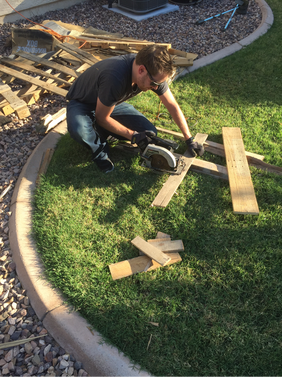
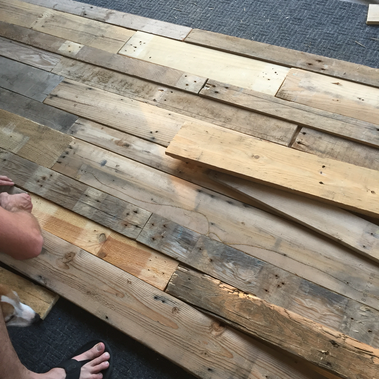
My hubby did 99.9% of all the work but he never once complained so I am under the impression it was over all a pretty easy project. He would probably say the most labor intensive part was ripping up the pallets and separating all the wood pieces from those. But once that's all done the rest is kind of fun and simple.
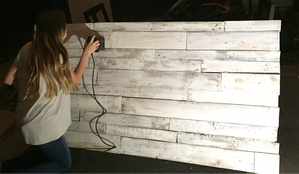 | 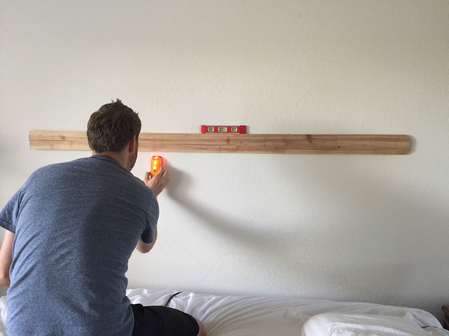 |
I helped with arranging the wood and giving my input on the layout that looked best, and I did some of the sanding too. Oh! And I helped him carry it up the stairs and hang it on the wall - so yay I did some of the work too. But really, it was Eric. He's the best. <3
Thank you Live Simply for the instructions and inspiration for a beautiful headboard that my husband and I both enjoy. Now I can begin putting the rest of our room together and continue working towards making it feel as romantic and relaxing as I want it to be.
Thank you Live Simply for the instructions and inspiration for a beautiful headboard that my husband and I both enjoy. Now I can begin putting the rest of our room together and continue working towards making it feel as romantic and relaxing as I want it to be.

 RSS Feed
